SIM installation

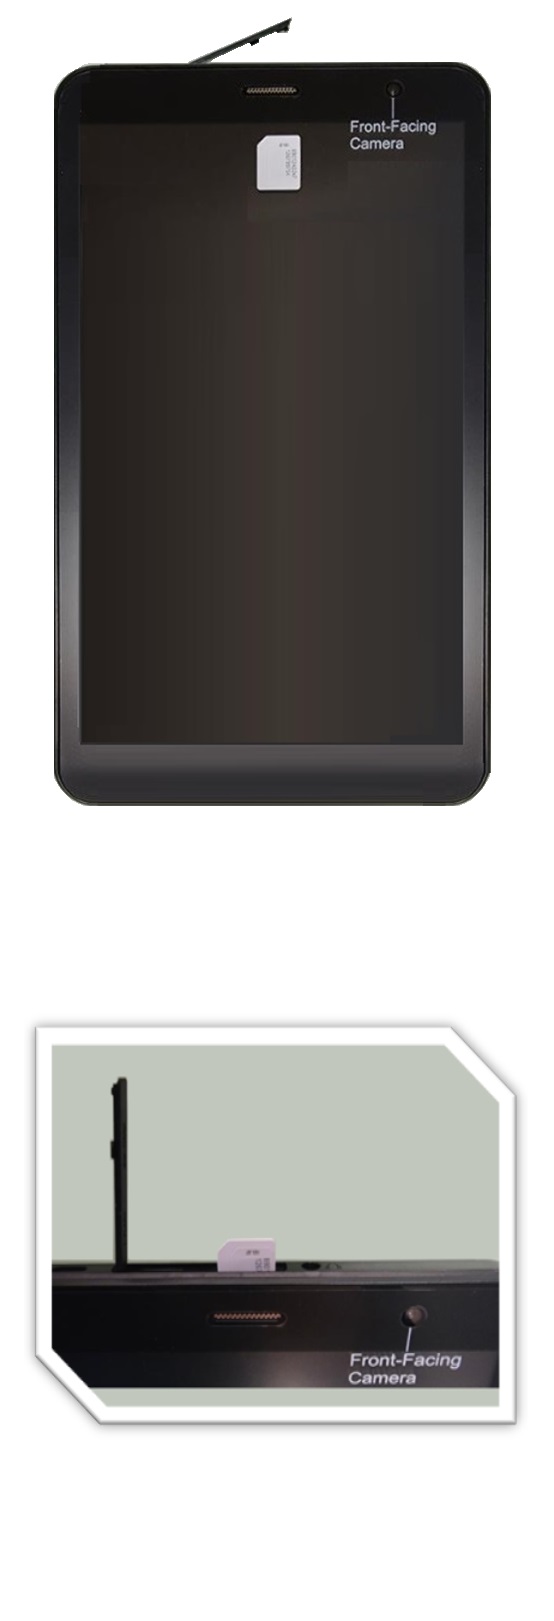
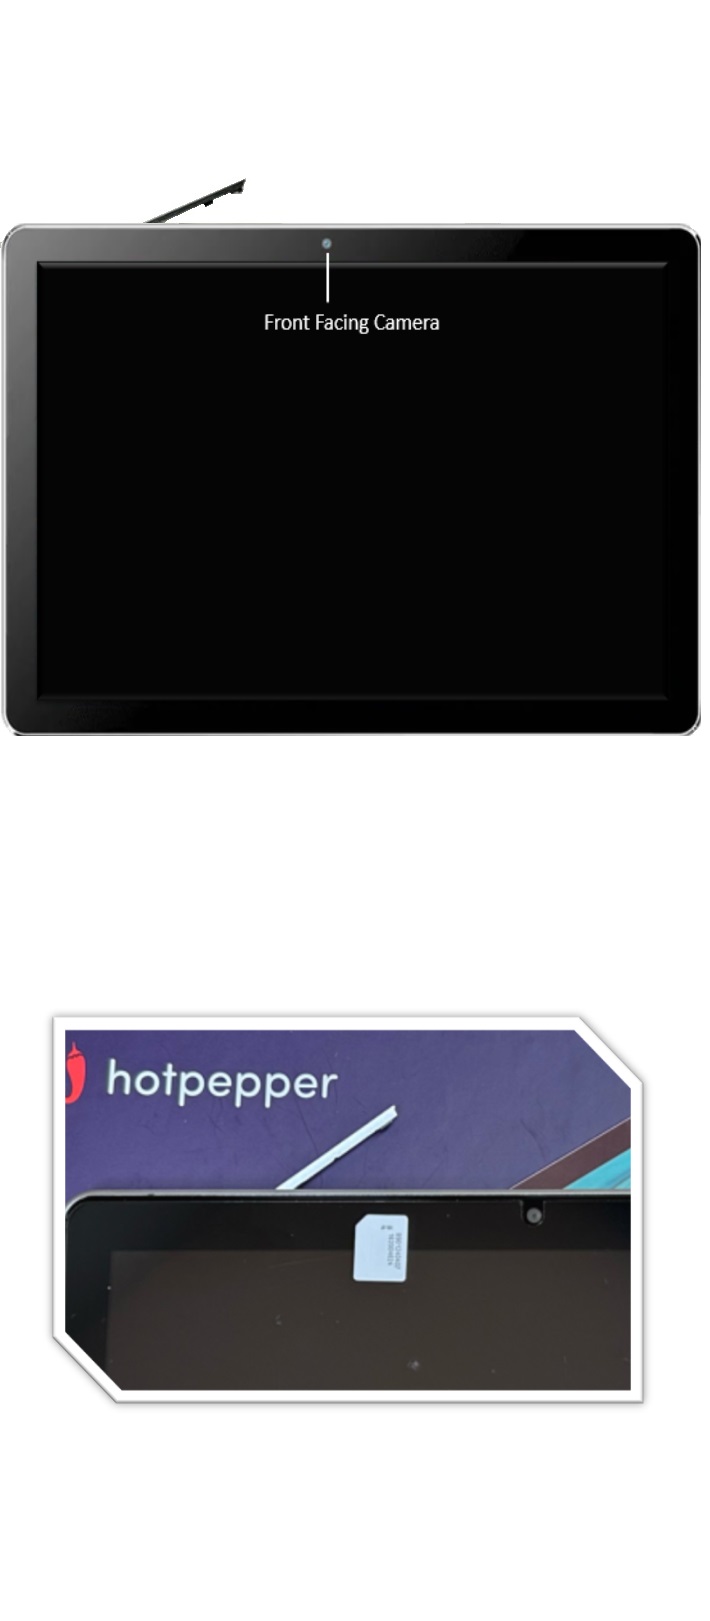
SIM Installation Guide

Please follow the below Steps to Install or replace the SIM on a Tablet shipped by us.

about-us

Types of SIM


Before beginning understand the types of SIM


Refer to the Image on the left. The type of SIM and its dimensions are provided.

Most Tablets shipped by IPC support "Micro SIM Card".


Device Specific Instructions

Scroll down to the device model you have and follow the instructions.

about-us

Cellution Iris Tablet or Hyundai HYtab Tablet


Step 1: Locate the SIM card slot and open the slot

The SIM slot is on the Top of the tablet for both Cellution Iris and Hyundai HYtab Tablet Models.

Hold the tablet in vertical position with LCD front facing you and with the Front Camera on the Top.

SIM slot now be located towards the top of the tablet.

Gently pry open the slot cover from right side as shown in the figure.


Step 2: Remove existing SIM card

If you are replacing an existing SIM, you can remove the existing SIM by gently pushing the SIM card in
and it will pops-up from its locked position.

Once the SIM pops up you can pull the SIM out.


STEP 3: Insert the New SIM card

This tablet only supports "Micro SIM".

To insert the SIM It is IMPORTANT to correctly position the SIM. The SIM card must be oriented with
cutout/notch on top left with terminals facing down. Refer to the picture.

Push the SIM card in the SIM slot until it clicks and locks in.

Caution: SIM can be inserted with wrong orientation, it will click in but will not work.

Caution: Nano SIM size is too small for SIM slot and can get stuck in SIM slot.


STEP 4: Verify SIM Connectivity

Turn on the device and verify that network signal bars show in notification bar. .

The SIM card shipped to you is Pre-Activated. Meaning - it is already activated by us and
no activation is required to be done by you.

If the network signal bars do not appear, try checking for signal in outdoors.

Once the Signals bars are active you can start browsing the internet.

Play Video Guide to insert SIM in Hyundai/Cellution Tablet


about-us

HotPepper Puya Tablet


Step 1: Locate the SIM card slot and open the slot

HotPepper Puya Tablet's standard position is Horizontal. The SIM slot is on the Top of the tablet.

Hold the tablet in horizonal position with LCD front facing you, with the Front Camera on the Top.

The SIM slot can now be located towards the top of the tablet.

Gently pry open the slot cover from right side as shown in the figure.


Step 2: Remove existing SIM card

If you are replacing an existing SIM, you can remove the existing SIM by gently pushing the SIM card in
and it will pops-up from its locked position.

Once the SIM pops up you can pull the SIM out.


STEP 3: Insert the New SIM card

This tablet only supports "Micro SIM".

To insert the SIM It is IMPORTANT to correctly position the SIM. The SIM card must be oriented with
cutout/notch on top left with terminals facing down. Refer to the picture.

Push the SIM card in the SIM slot until it clicks and locks in.

Caution: SIM can be inserted with wrong orientation, it will click in but will not work.

Caution: Nano SIM size is too small for SIM slot and can get stuck in SIM slot.


STEP 4: Verify SIM Connectivity

Turn on the device and verify that network signal bars show in notification bar. .

The SIM card shipped to you is Pre-Activated. Meaning - it is already activated by us and
no activation is required to be done by you.

If the network signal bars do not appear, try checking for signal in outdoors.

Once the Signals bars are active you can start browsing the internet.

Play Video Guide to insert SIM in HotPepper Tablet

Call IPC’s Customer Support 833-778-0321 (Toll-Free)

Find out how you can enroll in the ACP program and get all your questions answered.


Enroll Online in 4 easy steps


Move to scrolling

*Enrollments are subject to the ACP rules and requirements.

Enroll Now Have Questions? Visit FAQ